FAQ
How to auto-start and shutdown media pinball player.
How I installed a mini display on my pin with no playfield modifications.
How to Auto-Start and Shutdown Media Pinball Player
Turning your pinball machine and media pinball computer on and off with a single button can be easily accomplished with the help of a Smart Strip.
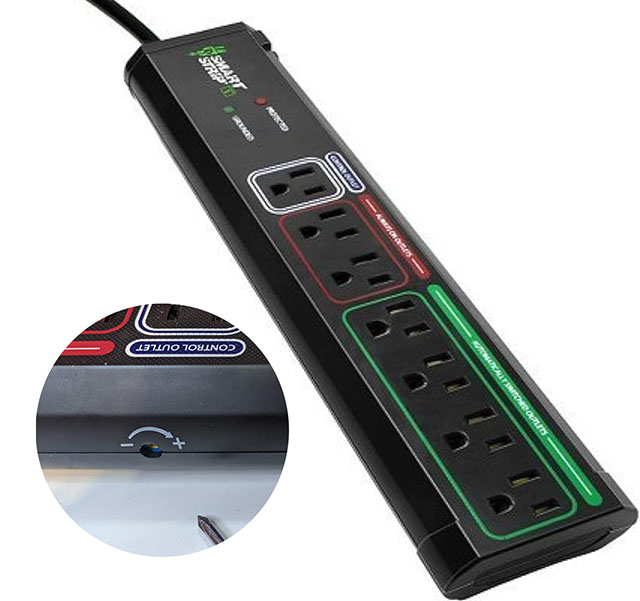
Bits Limited Smart Strip is available on Amazon.com
How does it work? You simply plug your mini-computer that runs our Media Pinball Player program into the Control Outlet. Plug your pinball machine into one of the Automatically Switched Outlets and keep your pinball machine turn on at all times. Power is not available to those outlets until the device that is plugged into the control outlet is turned on.
You can in theory use any smart strip, but we like the Bits Limited Smart Strip because it comes with a sensitivity dial. Mini-computers draw very little power and if not enough power is being drawn, it will shut down your other devices which isn't the case when using this smart strip. Once I turned it's sensitivy adjustment fully counterclockwise, my pinball machine always stayed on if and only if my computer was turned on.
To auto-start our media player, you'll need to do the following in windows:
- Within our media player, click the "Setup" button and then check the following 2 boxes: "Full Screen on Start" and "Auto Launch Player on open"
- To auto-start a program in windows 10/11, press the Windows + R keys and type "shell:startup" + press Enter.
- Add a shortcut to our Media Pinball Player app and you're good to go.
To shutdown your computer and pinball machine at the same time, you'll need to do the following in windows 11:
- Within search on your computer, enter "Control Panel" and select it from the results.
- Select "System and Security"
- In the "Power Options" section, select "Change what the power buttons do".
- Change the setting "When I press the power button" to "Shut down" when plugged in.
- Click on "Save Changes"
- Now, when you press the power button on your mini-computer, your computer will perform a clean shutdown procedure and your pinball machine will automatically turn off if you're using a smart strip.
How I installed a mini display on my pin with no playfield modifications
Installing a mini display on your playfield with media synced to your dmd is actually easier then you would expect.
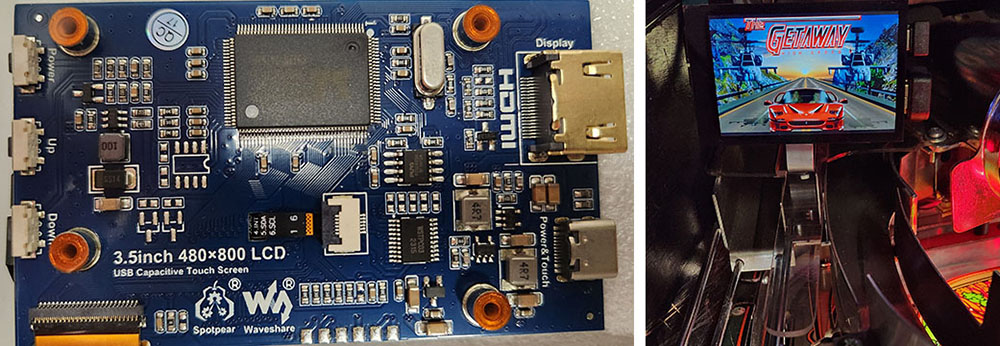
To get started, I purchased an 3.5" mini display from Amazon. When purchasing a mini display, make sure it is compatible with Windows and has an HDMI port.
What I bought:
- Coolwell 3.5" LC Display HDMI - View on Amazon
- M2 Screws Needed for Mounting - View on Amazon
- U-Shaped USB C Adapter - View on Amazon
- U-Shaped HTMI Adapter - View on Amazon
- 1/16" x 1/2 inch piece of aluminum flat bar - Purchased in store at Lowes
The display I purchased came with a HDMI and an USB cable. The USB cable is used to power the monitor and the HDMI cable is used to connect this monitor to a computer.
Since the USB and HDMI ports are on the side, I used U-Shaped adapters to help hide those cables. I didn't feel there was a need to hide those adapters but if they bother you, can you always get a special case 3d printed.
To mount the display to my playfield, I didn't want to make changes to the existing playfield so I opted to create a simple mounting bracket with a small aluminum flat bar I purchased at the hardware store.
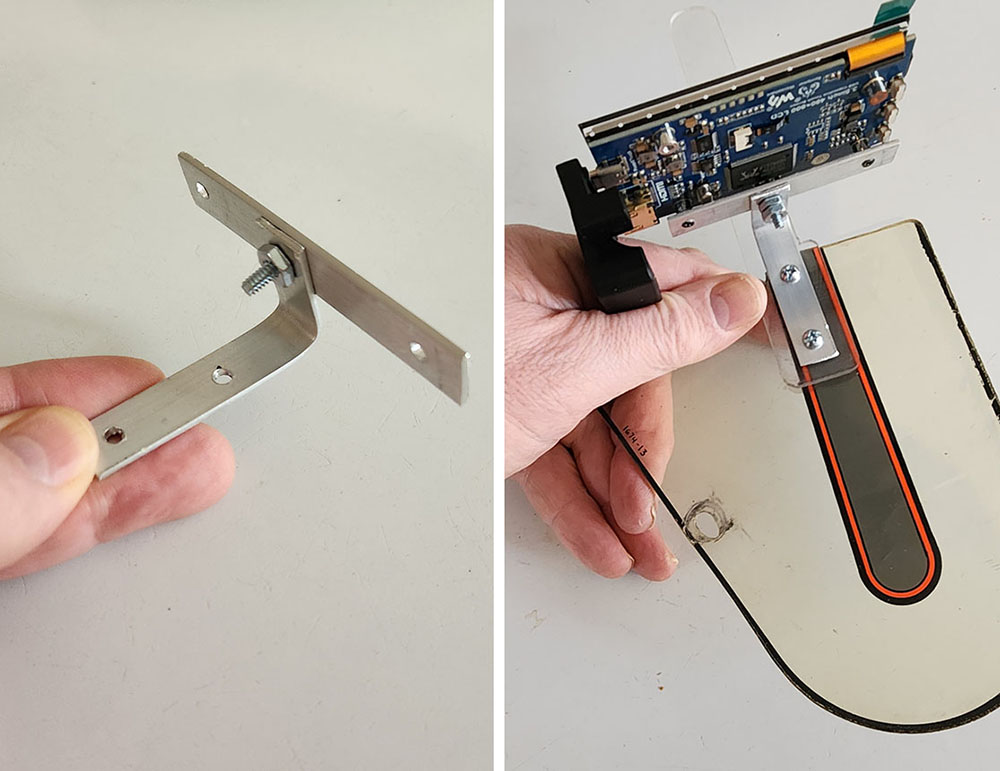
In the above picture, you can see how I cut a small piece of aluminum which I screwed to the mini display with M2 screws. Before doing so, I attached another piece of aluminum to the middle with 1 single screw. After I bend that piece of aluminum, I was able to mount this display directly to some existing playfield plastics. What I loved about this approach is that I didn't need to make any playfield modifications so you'll never know this mod was done once you remove it.
I also opted to place this mini-display towards the back of my pinball machine which makes it easier to hide the cables since they can be hidden behind the playfield.
Due to the location of the mounting holes on this display, I had to change the display settings in Windows to flip horizontally since the display is in essence mounted upside down.